


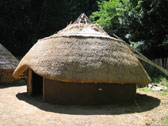
 Da ni wedi gorffen! Hwre!
Mi gymerodd bump wythnos i doi'r to, a da ni gyd wedi blino'n lan. Dwi'n hapus iawn gyda canlyniad ei'n gwaith. Fe gychwynom ni gasglu'r nwyddau ar gyfer y ty ar y cyntaf o Fawrth. Felly, mi wnaeth y gwaith gymeryd pedair mis a hanner yw gwlbhau. Adeiladom y wal mewn glaw trwm, ac mi doi'om ni yn ystod haul tanbaid.
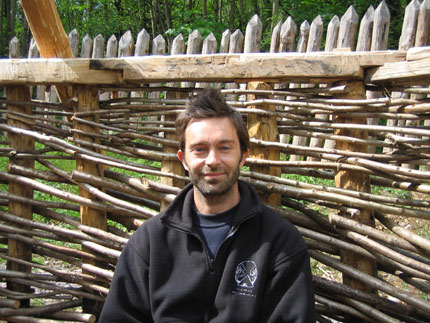
Swn i'n hoffi diolch i bawb a gymerodd ran yn y gawith o ailgodi Moel y gaer. Mae'r rhain yn cynnwys fy nghyd weithwyr, Tim Halewood ac Andy Dorsett, ond yn arbennig Ian Daniel - dehonglwr y Pentre Celtaidd. Roedd ei ymroddiad a'i frwdfrydedd di-baid yn help mawr. Swn i hefyd yn hoffi diolch ein gwirfyddolwyr, Lauren Parfitt a Dylan Hammond, Zoe Dummet a Tigger Whelan. Diolch hefyd i Andrew Smith am ei waith ar ein gwefan.
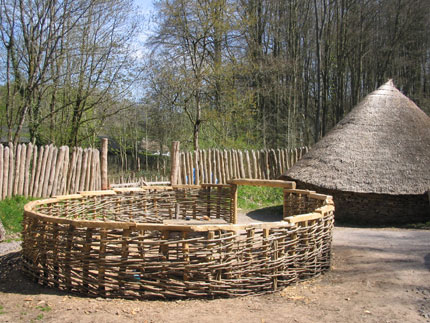
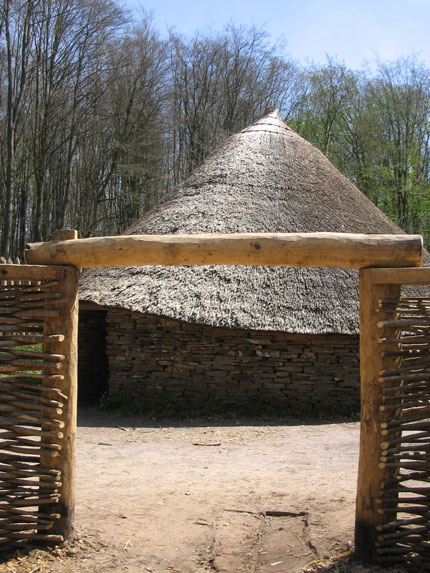
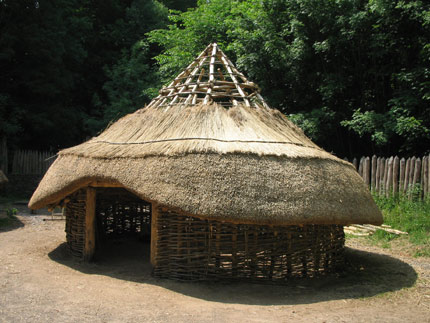
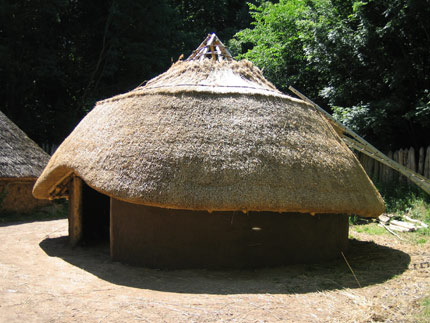
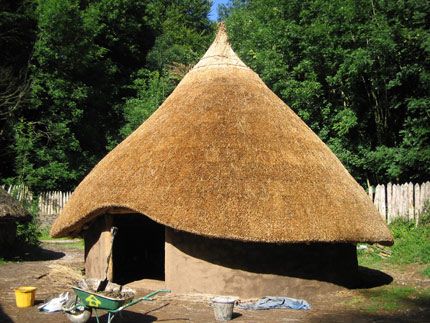
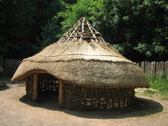
We've finished! Hooray!
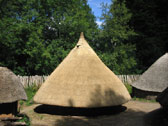
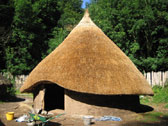
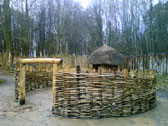
It took five weeks to thatch the roof, and we're all knackered. I'm very happy with the results. We started gathering the materials needed for this build on the first of March, so the house has taken us four and a half months to complete. The wall was built during torrential rain, and the roof was thatched during a heatwave.
I would like to thank all those involved in the re-building of Moel y gaer. These include my staff, Tim Halewood and Andy Dorsett, but especialy Ian Daniel, the Celtic Village's resident Celt. His dedication and constant enthusiasm helped to keep our spirits high throughout the build. I would also like to thank our volunteers, Lauren Parfitt and Dylan Hammond, Zoe Dummet and Tigger Whelan. Thanks also to Andrew Smith for his work on our website.

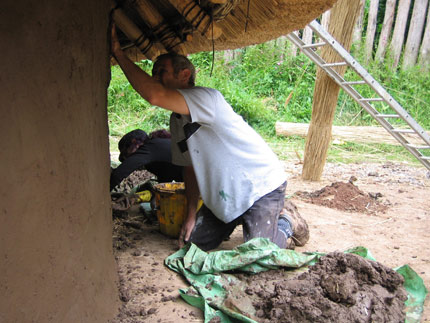
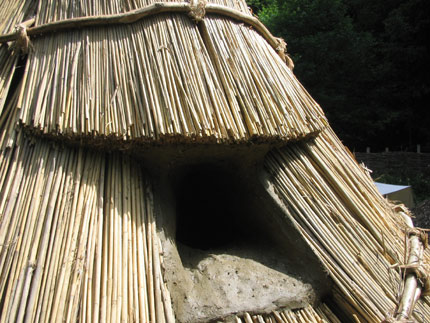
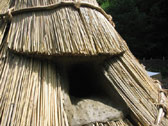
 I have just finished constructing a clay-lined chimney, or more accurately, a smoke-hole. This is at the very top of the house, but towards the back and oppsite the door.
The Museum wanted a chimney in this house because one of their houses is very smokey. They fear that this is detrimental to the health of those working there. S
ome people think a chimney in a roundhouse is a terrrible idea, for it creates a draw that can take any sparks from the fire, up into the thatch. Others disagree.
Changing the nature of the fire itself is a good way of preventing accidental fires. For instance, a well built fire made from well chosen firewood shouldn't create any sparks. The only way to know is to try it out, and see what happens.
This is experimental archaeology at its best.
I have just finished constructing a clay-lined chimney, or more accurately, a smoke-hole. This is at the very top of the house, but towards the back and oppsite the door.
The Museum wanted a chimney in this house because one of their houses is very smokey. They fear that this is detrimental to the health of those working there. S
ome people think a chimney in a roundhouse is a terrrible idea, for it creates a draw that can take any sparks from the fire, up into the thatch. Others disagree.
Changing the nature of the fire itself is a good way of preventing accidental fires. For instance, a well built fire made from well chosen firewood shouldn't create any sparks. The only way to know is to try it out, and see what happens.
This is experimental archaeology at its best.
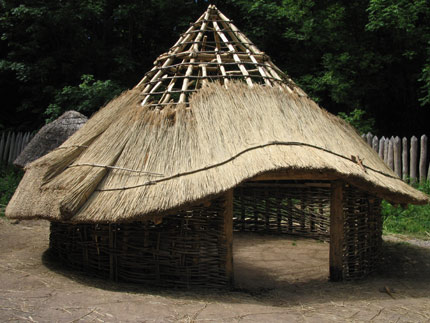
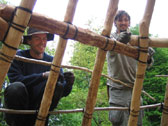
 Well, I'm still thatching, and on top of my ladder it's very hot. Because of the surrounding trees there is no wind, and the thatched roof reflects the heat straight back at me.
I have to do it in small stints, and drink plenty of water. The roof's looking good though.
Well, I'm still thatching, and on top of my ladder it's very hot. Because of the surrounding trees there is no wind, and the thatched roof reflects the heat straight back at me.
I have to do it in small stints, and drink plenty of water. The roof's looking good though.


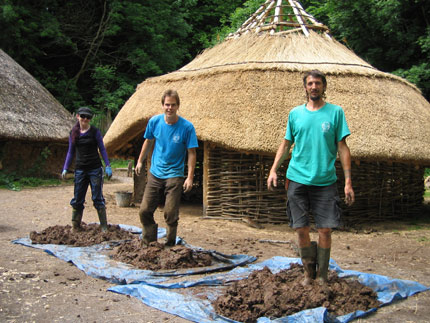
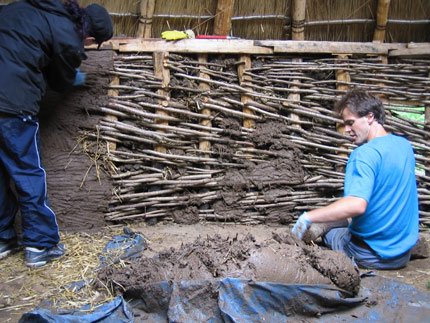
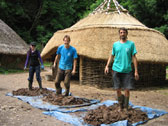
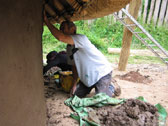
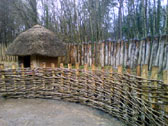
 While I've been thatching, my associates have been daubing the wattle wall. Daub is a mixture made from clay, earth and cow manure. It is stomped around by foot until it reaches the desired consistency.
I couldn't say exactly how much we used, but I imagine it must be a tonne of each. We applied it in two layers, one to fill the gaps in the wattle, and the second was a finishing coat.
Mixing the daub is exhausting work, but applying it is great fun and very satisfying.
While I've been thatching, my associates have been daubing the wattle wall. Daub is a mixture made from clay, earth and cow manure. It is stomped around by foot until it reaches the desired consistency.
I couldn't say exactly how much we used, but I imagine it must be a tonne of each. We applied it in two layers, one to fill the gaps in the wattle, and the second was a finishing coat.
Mixing the daub is exhausting work, but applying it is great fun and very satisfying.
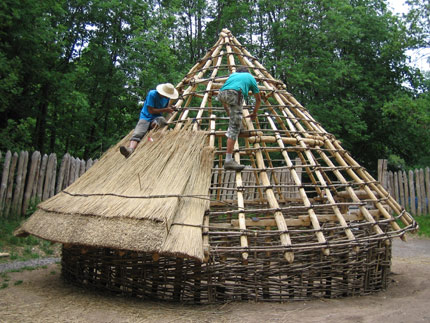
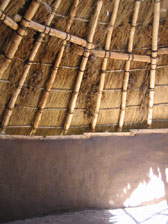
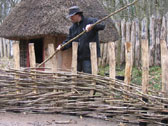
 We've been thatching for two weeks now, and it's going well. The weather has been hot and dry, and has allowed us to get a lot done. The thatch is Water-reed from Hungary. I realise that Hungary isn't exactly local, but I couldn't get any native reed.
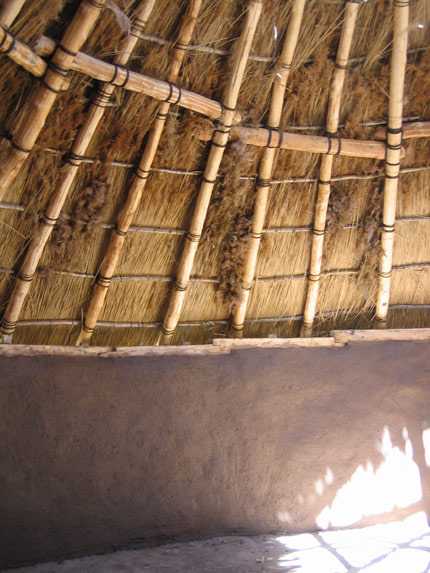
The thatch is laid onto the roof, and sandwiched in place with a Hazel rod (called a 'sway'). The sway is tied with string to the underlying Hazel rod (the 'purlins' - the ones that are tied to the roof). The reeds are then beaten up to match the slope of the roof using a 'leggat'.
Thatching is a very satisfying occupation. The material itself is light, and is easy to pick up. The thatching is done by hand, and is virtualy silent. The only sound you hear is the birdsong. The downside of thatching is that you have to spend all day working off a ladder, and there is no shade to protect you from the hot Sun.

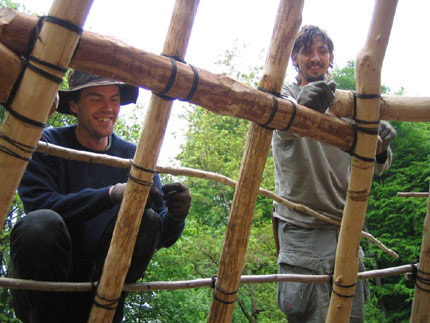
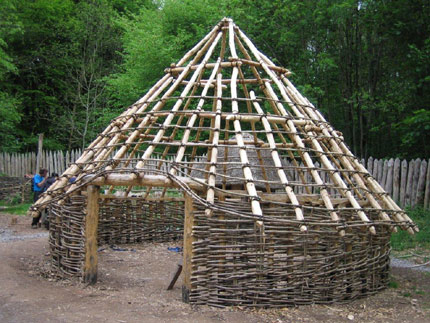
 Today we started to apply the purlins to the roof. Purlins are made from thin rods of Hazel. These are lashed onto the roof and run horizontaly around the house. A layer of Water-reed thatch will then be laid onto the purlins. The reeds will be sandwiched in place with another Hazel rod (called a 'sway'), that will be tied to the purlin underneath. The string we used was 'tarred marlin', and is traditionally used for thatching.

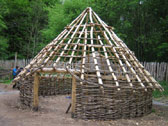
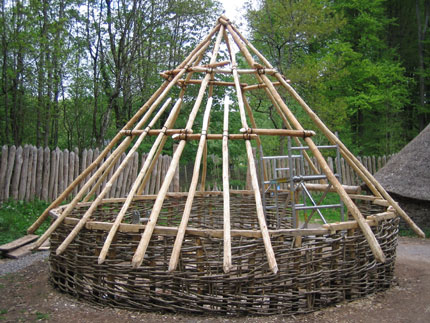
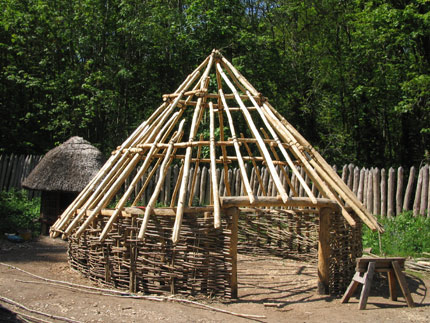
 We've just finished the framework of the roof. It looks good and feels strong. Dave Chapman from Ancient Arts came to see us this week. He's a fellow roundhouse builder, who built two wonderful 30 footers at Melin Llynon in Anglesea. It was great to meet him.
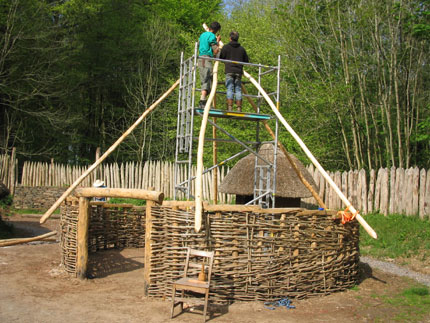
 The first six rafters went up easily. Then I was faced with a conundrum:
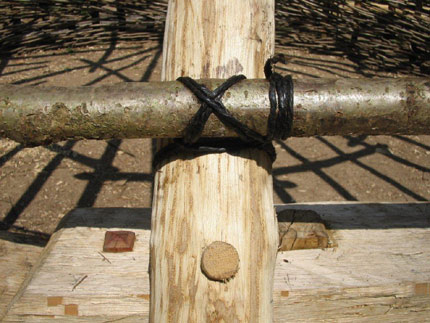
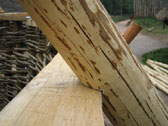
Ring-beams are horizontal beams that serve to stiffen the roof, and also supply springing points for another set of rafters. My conundrum was whether to have these beams on the inside, or the outside, of the rafters. If the beam was on the inside, it would only be held up by the string that holds it there, and a peg put in there would just want to slip out. Putting the beams on the outside of the rafters, on the other hand, seems the natural way to have them. We dug notches into the beams, so they'd grab onto the rafters. These notches prevent them from sliding down, for the rafters are at an angle to the ring-beam. Gravity also keeps them in place.
The first six rafters went up easily. Then I was faced with a conundrum:
Ring-beams are horizontal beams that serve to stiffen the roof, and also supply springing points for another set of rafters. My conundrum was whether to have these beams on the inside, or the outside, of the rafters. If the beam was on the inside, it would only be held up by the string that holds it there, and a peg put in there would just want to slip out. Putting the beams on the outside of the rafters, on the other hand, seems the natural way to have them. We dug notches into the beams, so they'd grab onto the rafters. These notches prevent them from sliding down, for the rafters are at an angle to the ring-beam. Gravity also keeps them in place.
Once these were in, we could start placing the next set of rafters. These were notched, which alows them to hook onto the ring-beam. These were then lashed with tarred string. All six of the secondary rafters went up quickly, and we began installing a new ring-beam, lower down.

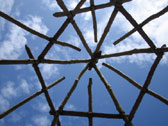

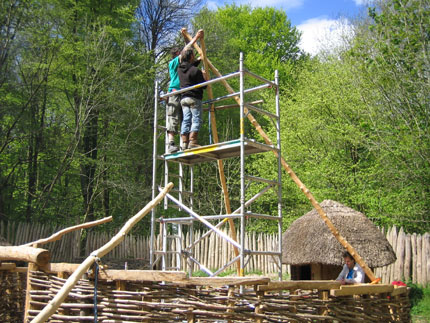
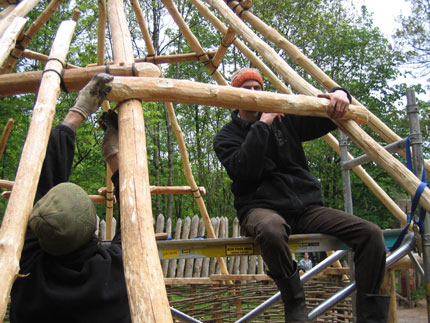
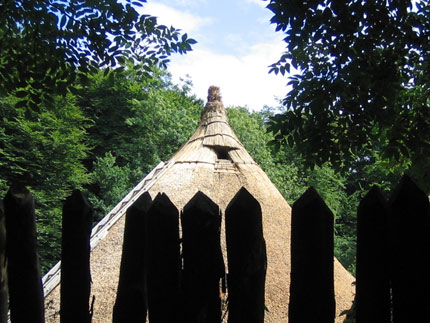
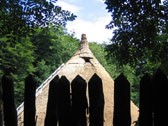
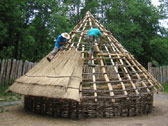
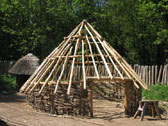
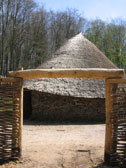
 Raising the roof is my favourite bit of building a roundhouse. It is at this stage you see what the house will look like. You can see its shape, proportions, and character. This one is very sweet. I love the pointyness of the roof. Its pitch is steeper than my previous roundhouses, at 51 degrees, rather than 45. This will help with water run-off, and create a bigger internal space.
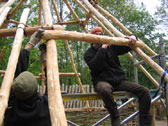
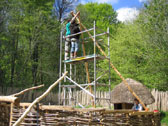
I know it's not exactly Iron-age, but for Health and Safety reasons we used an aluminium access tower to aid the construction. We could stand on it, and have the rafters passed up to us individualy. Four rafters were raised into position, and made to fit nicely at the apex. These were then lashed with tarred string. Lower down, the rafters were pegged into the wall-plate.


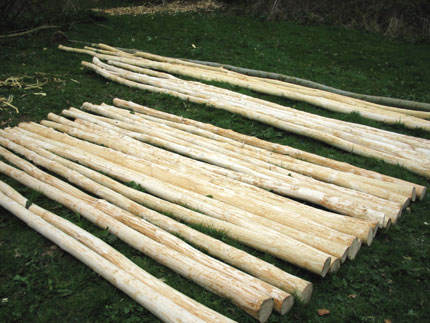
 Having taken a week off work, we went back into the woods to collect the timbers we need to build the roof of the Moel y gaer roundhouse. We needed 36 Ash rafters, 18 parts of the ring beams, and a mountain of Hazel rods for the purlins and sways. Job done. We'll start erecting the roof on the 4th of May.

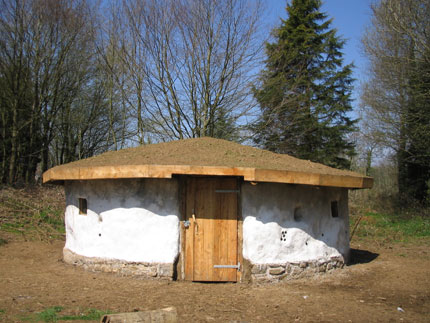
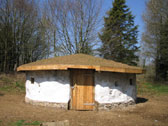
 Today we went back to Pencoed College to finish the roundhouse we built for them. The weather was just right for whitewashing, and it only took a few hours.

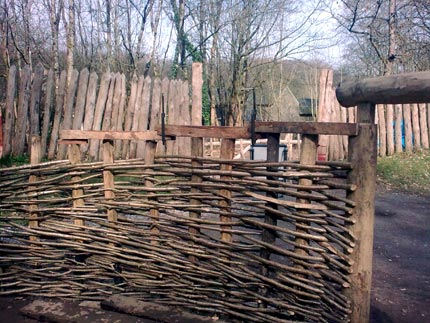
 We've just finished installing the wall-plate. It took a bit longer than anticipated, but it's strong and looks good.
 We're working on the timber wall-plate at the moment. It sits on top of the wattle wall, and is there to prevent it splaying. It involves lots of nice carpentry work, mainly mortice and tennons, and lap/scarf joints. It's slow going. We have to re-work the same piece of wood several times, in order to get it to sit level, and for it to be level with its two neighbours. Because the wall slopes up to the door, the wall plate had to rise in the same way. I didn't like the idea of a sloping wall-plate, therefore the slope is composed of a series of level steps. These being level will help keep the roof rafters securely in place. We've probably got another two or three days to go on this stage.

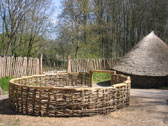
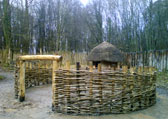
 Yn y tridie diwethaf, rydym wedi llwyddo rhoi'r ffram ddrws yn ei le, taro 52 postyn i mewn i'r ddaear, a gorffen plethu'r wal wial. Glaw trwm ar adegau, ond doedd dim ots, oherwydd ein bod yn gwisgo ein hetiau glaw newydd.
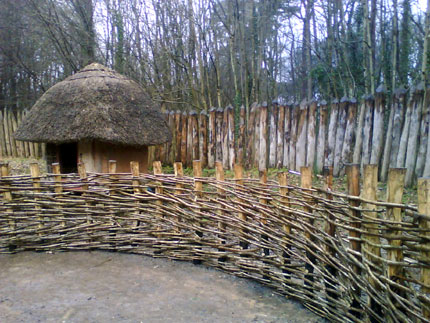
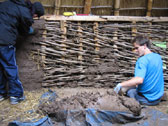
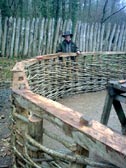
In the last three days we have managed to raise the doorframe, bang 52 posts into the ground, and finished wattling the wall. Great progress. The wall is as strong as an ox. Next week we'll make it even stronger, by adding a wall plate (or tension band) to its top, which will contain the roof's outward thrust. Big thanks to Dylan Hammond for his help this week.
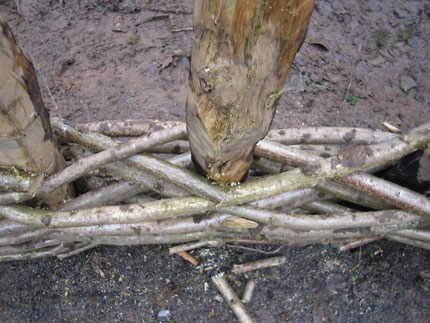
 Banging the posts into the ground was easy, and didn't take long. The wattling involved quite a bit more head-scratching. Our hazel rods were too thick to bend in-between each of the posts, which are spaced at 1' intervals. We decided to go around 2 instead. This worked, but caused a gap in the weave in-between every second post. This gap would enable the posts to move from side to side - which is a bad thing. This was overcome by starting each new layer of Hazel at the next post along. This method ensures that there's a crossing in-between each post, thereby preventing any lateral movement.

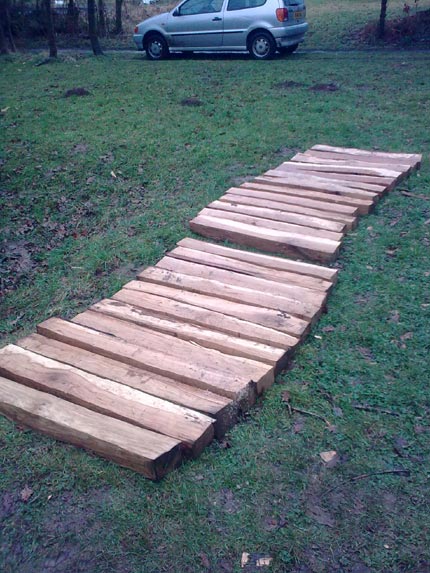
 Over the last few days we've managed to make all 26 sections of the wall-plate. This is a wooden ring that sits on top of the wattle wall. The posts will be tennoned into it, and each section of the wall-plate will be lap-jointed onto the next. This structure will resist the outward thrust of the conical roof, and keep the house circular. We began by splitting big Oak logs into quarters. We then axed-up the quarters into 5" x 3" x 3' blocks. It rained heavily this afternoon for the first time in ages. We're off to the National History Museum in St. Fagans on Monday, to start building. Exciting stuff.
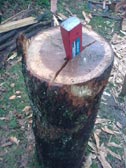
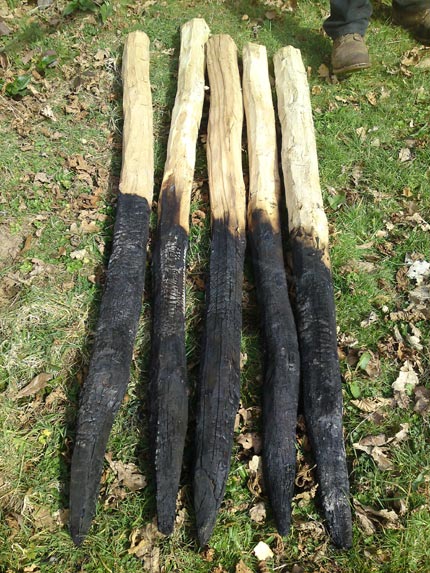
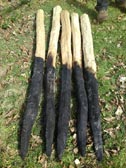
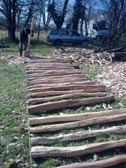
 Today was bonfire day. We lit a big fire in order to char the bottom of the wall and door posts. The theory is that a layer of charcoal on the ground-penetrating area of the post slows the rate of decay. Because we'd been axing all week, sitting around a fire watching wood burn was a welcome break. Our timbers now look like David Nash sculptures.

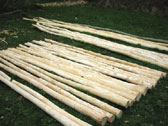
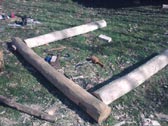
 We managed to strip all 50 posts of their sap-wood, and they're all pointed & ready to be hammered into the ground. The Oak was felled about 2 years ago, giving time for the sap-wood to soften up a bit. Axing these was relatively quick and easy. Other Oak timbers didn't need axing because they were cut from standing dead-wood (where the sap-wood rotted off years ago). I also managed to joint-up the mighty-looking
door-frame (2 tennons and 2 mortices).
We managed to strip all 50 posts of their sap-wood, and they're all pointed & ready to be hammered into the ground. The Oak was felled about 2 years ago, giving time for the sap-wood to soften up a bit. Axing these was relatively quick and easy. Other Oak timbers didn't need axing because they were cut from standing dead-wood (where the sap-wood rotted off years ago). I also managed to joint-up the mighty-looking
door-frame (2 tennons and 2 mortices).
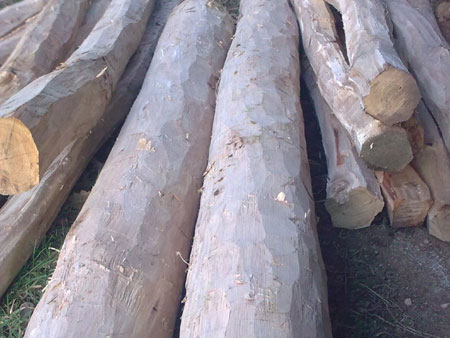
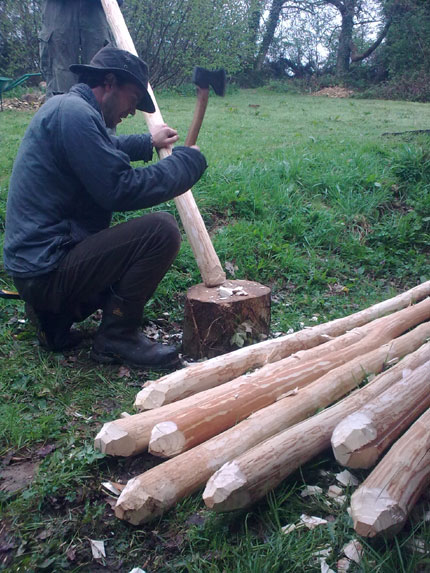
 Today we've been axing wood like mad. It's been great! All the sapwood needs to come off the Oak because that rots too quickly. I'm working with Tim Halewood and Andy Dorsett, both of whom are skilled woodworkers. We managed to strip 15 posts (out of 50), and two chunky door-posts.
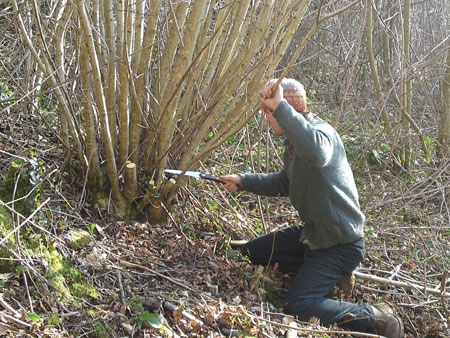
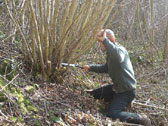
 Today we managed to collect all of the hazel rods required for weaving the wattle wall. Another lovely day in another lovely wood.
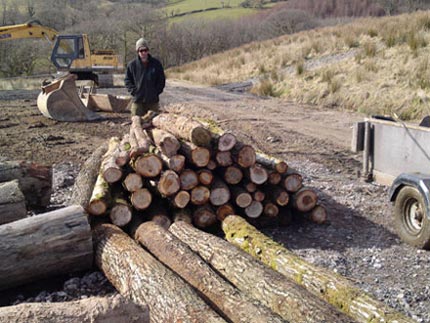
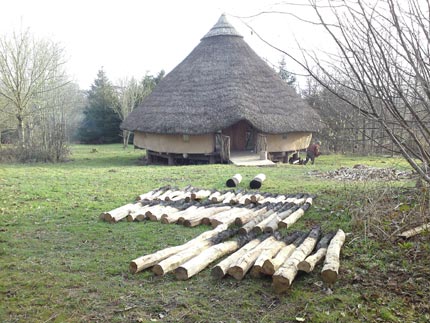
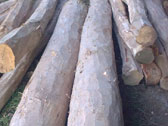
 I'm also about to start building a roundhouse for the Celtic Village in the National History Museum, St. Fagans. This one is also 19' in diameter, but built in an Iron-Age style. We recently collected all of the oak timbers required for the build. These came from a beautiful woodland in Glyn Ogwr, near Blackmill.

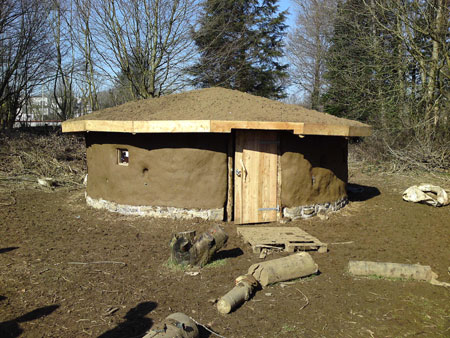
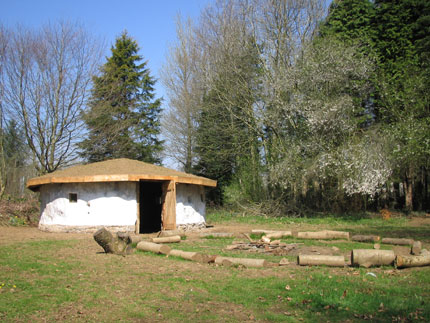
 Helo gyfeillion / Hello friends, Welcome to my roundhouse diary. Every couple of days or so I will upload a picture, and a paragraph about my current work. Here is an image of a roundhouse that I'm building for Pencoed College Forest School. It is very nearly finished. It is 19' in diameter and has a turf roof resting on straw bale walls. I'm looking forward to seeing the walls whitewashed, and the Chamomile and creeping Thyme roof.
